
The Bottom Line
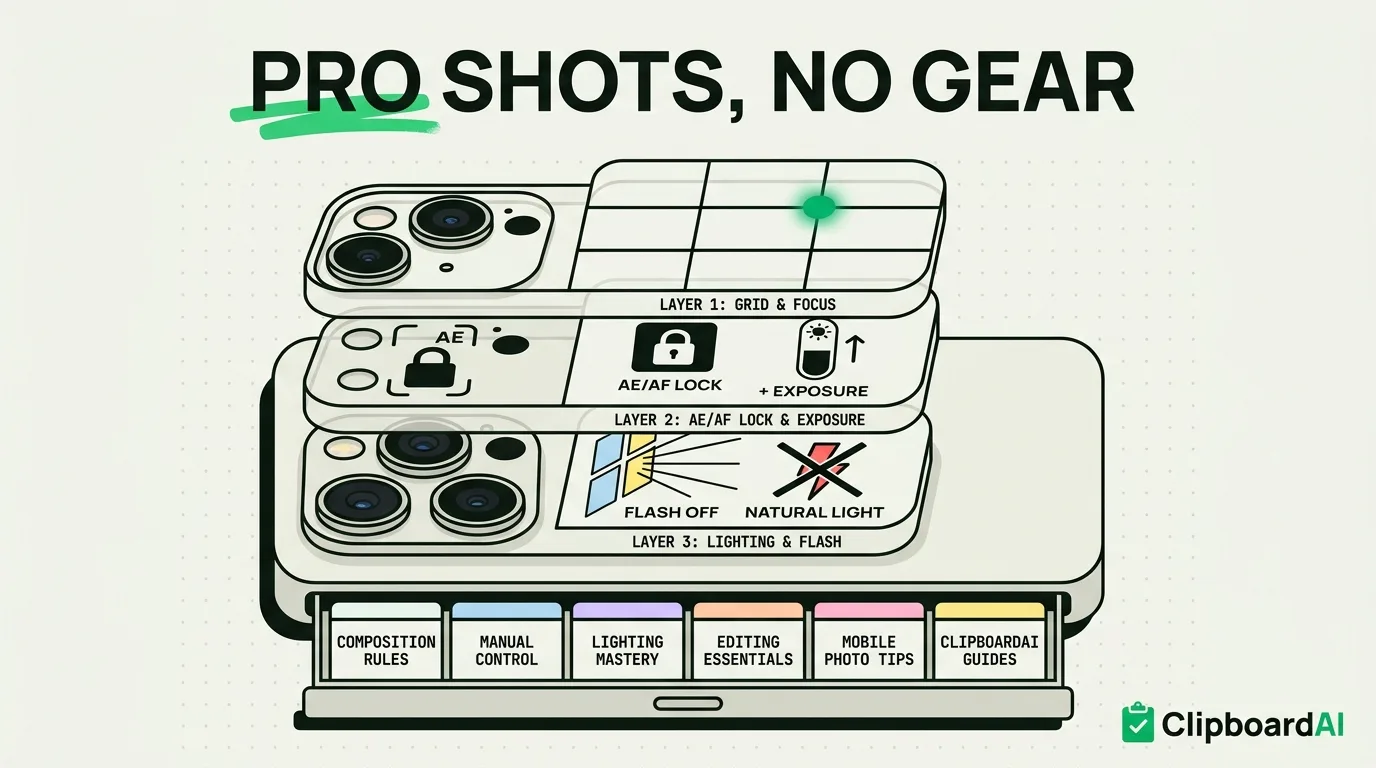
The camera hardware in a modern iPhone is not the limiting factor for most people's photos, the settings and habits around it are. Three changes make a bigger visible difference than any filter: shooting in the native Camera app instead of a third-party one, tapping to set exposure separately from focus, and using grid lines to fix composition before the shot instead of cropping after.
Separate Focus From Exposure (Most People Never Do This)
Tapping the screen in Camera sets both focus and exposure together, which is fine most of the time but fails in high-contrast scenes (a backlit subject, a sunset with a person in frame). Tap and hold on the subject until you see "AE/AF Lock" appear, then drag the small sun icon that shows up next to the focus box up or down to manually brighten or darken the exposure before you shoot. This one habit fixes more washed-out or too-dark photos than any editing app afterward.
Turn On Grid Lines and Use Them
Settings > Camera > Grid turns on a 3x3 overlay. Placing your subject on one of the intersection points (not dead center) is the single most reliable composition upgrade for casual photos, and it costs nothing to enable. It is off by default, so most people never see it.
Natural Light Beats Flash Almost Always
Indoors, iPhone flash produces the flat, harsh look people associate with "phone photos." Facing a window (even an overcast one) produces dramatically better skin tones and shadow detail than flash, in almost every indoor scenario. If the room is too dark for a window to help, raising ISO by tapping the exposure sun icon before shooting (see above) usually looks better than firing the flash.
Portrait Mode: When It Helps and When It Doesn't
Portrait mode's background blur works well on faces and clearly separated subjects, and struggles with fine detail like hair strands, glasses edges, or subjects close to a busy background, sometimes blurring the wrong things. For anything with fine edges, standard photo mode with a genuinely blurred background (get physically closer to your subject, put distance between subject and background) produces more reliable results than Portrait mode's software guess.
The Unsexy Problem: Losing Track of Good Shots
A separate practical issue that has nothing to do with camera settings: after a shoot, people often copy a photo's caption idea, a location tag, or edit notes into Notes and lose track of which shot it belonged to. If you write captions or editing notes on your phone before transferring photos anywhere, a clipboard manager with history (rather than the single-item iOS clipboard) means you can draft several captions in a row without one overwriting the last, then paste them in order when you are ready to post or export. ClipboardAI is one option for this, though it is a minor convenience next to the actual shooting techniques above.
Frequently Asked Questions
How do I stop iPhone photos from looking washed out or too dark?
Tap and hold on your subject to lock focus and exposure (AE/AF Lock appears), then drag the sun icon up or down to manually adjust brightness before taking the shot. This fixes most exposure problems that automatic metering gets wrong in high-contrast scenes.
Should I use Portrait mode or regular photo mode for people?
Portrait mode works well for a single clearly separated subject and struggles with fine detail like hair or glasses against a busy background. For those situations, standing closer to your subject in regular photo mode with more distance to the background often looks more natural.
Do grid lines actually improve iPhone photos?
Enabling Settings > Camera > Grid and placing your subject on one of the intersection points instead of dead center is one of the simplest, most reliable composition improvements available, and it is free and instant to turn on.